No products in the basket.
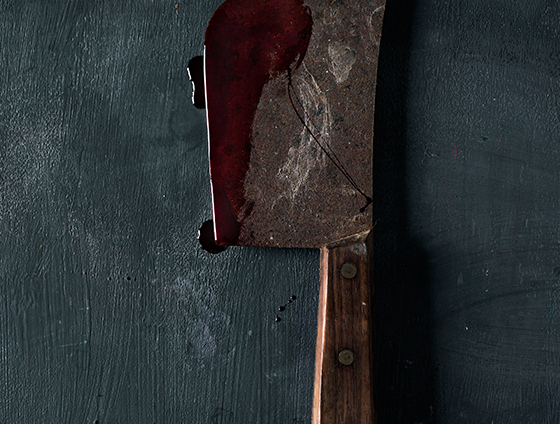
Dan Bieranowski takes us through his process for sound designing the 2021 LA Haunted Hayride. This sound design features everything you’d expect from a haunted house attraction, moody atmospheres, clanking chains, groaning voices, gruesome splats, it’s got the lot.
Dan goes step-by-step, showing us his thoughts and processes when sound designing a scene like this. Not to be missed, enjoy…
Video transcription
Hey, everybody. Dan Bieranowski here again to discuss haunted attraction sound design. This time, we’ll be taking a look at a scene from the 2021 addition of La Haunted Hayride. One scene in particular, about about 1 minute long. We’ll be covering how I go about designing this type of track and the different tools that I might use from a company like Krotos Audio to create the desired design that I want. First we’re going to listen to the track fully through, and then I’ll break everything down kind of one by one.
The theme of this scene is you’re in a hayride cart and you pull up into the scene. And then you watch this scene kind of unfold around you of a sort of secret society, people in cloaks and a person under a guillotine and the kind of lead bad guy. The voice for this cult turns to the trailer and says, essentially, Should we kill this person? Of course, everybody in the trailer says, yes, of course we want to kill this person. And then he says, okay, let’s do it.
They drop the guillotine, it cuts the person’s head off. And then as the trailer kind of drives away, the monsters surround the cart and start chasing after you. So you’ll notice there’s some dialogue and it’s kind of Moody at the start. And then it escalates into the guillotine dropping and a bunch of Gore sound effects and such, with a big kind of driving drum beat and some chanting because it’s like a cult chasing after you to kill you. So let’s take a look, listen to it.
And we’ll see how we built this thing out.
To the spirit of Halloween.
We pledge our nightly offering.
Speak.
Now, do any of you object to the sacrifice.
Shall this lamb die?
So that’ll go ahead and fade out. And the idea, of course, is you get the initial show moment, then you have the big scare, and then you’re kind of chased away by the Colt. So let’s break this down and look at each track, kind of one by one. So first things first, we have this kind of war horn sound and this other kind of war Horn sound. These are just designed to kind of set the mood for the scene. Each scene in the hayride has kind of a different vibe.
There’s scifi stuff, there’s clowns and this one’s kind of culty and a little bit more folklore than some of the others. So I like this kind of sound to kind of set that natural kind of witchy feel. So this is that Warhorn sound. And then here’s another version of that kind of Warhorn. And I like the impact of that second one. And you’ll notice that I put it on the one of each of the loops of that kind of driving drum beat to keep that kind of folky vibe.
And there’s no real processing happening yet. But when we get to this voiceover, that’s when we start to hear some of the processing. So first, let’s take a listen to the drone that’s happening underneath this again, kind of setting the mood, getting things right in that pocket to feel eerie and creepy and draw people’s attention. So just kind of Moody. It’s dark enough to not sit on top of the voiceover that we’ll be hearing in a second. Next, we have some chains kind of rattling, and this is actually done using Reformer Pro.
Reformer has a chain library. So it’s really nice because I knew I wanted the chains to be subtle. I could actually just record my voice performing kind of how I wanted them to sound. And then I can turn on Reformer Pro and replace that recorded audio of my voice with the actual sounds of the chain. So here’s what the chains sound like. I’m going to bring that up a bit so you can hear that a little louder. So it’s just kind of setting the scene for again what’s to come?
Because there’s a guillotine. You figure the guillotine is pulled up by chains, so we need that kind of bed of chain sounds, even if people don’t hear it to me, adds to the setting the scene that is to come. So I put it in there, even though people may not notice it to me. I notice when it’s not there to show you how much work Reformer Pro is doing. Let’s listen to the chains again. Now let’s listen to my voice performance. So you have an idea of what I’m actually doing to get that chain cadence the way I like it.
Drag the chain so you can hear me just saying drag the chain because I didn’t have anything else to say. And that’s what I wanted to use to create. So if I turn down the master dry wet, you’ll actually hear my voice performance underneath that. I mean, performers the best for this kind of thing. It’s just super fast to get everything laid in the way I want from a sample library without having to lay it out piece by piece. I can just perform it. Turn on Reformer Pro and fire everything up that chain library.
I’ll go ahead and put a picture from the website where you can get that is just located within Reformer Pro and you can buy libraries through their website. It’s really convenient for getting different sound design, libraries and things like that that you can just drop right in and get to work on. You’ll notice that there are a bunch of different chain sounds. We’re just using that chain rattling B library, but you can see I auditioned four and chose the one I liked the most. Or I could have mixed the sounds from multiples.
I’ll show you what that will sound like in a little bit. So now let’s talk about the voiceover. So we’ve got our kind of scene set here and there’s this voiceover that occurs over the top of it. So this is kind of like a Warlock or whatever the person that leads the cult. And this was performed by John Cook, who’s the creative director of the event. And to show you kind of the plug in chain we’re using where he recorded his own voice over for this, we kind of got him set up with just a simple desktop Mike so that he can record things and send them to me without me having to be in the room with him, because these events and their sound design changes so fast and so frequently, we needed a way that he can handle this on his own.
So he just uses pro tools first, which is free and a cheaper mic, but that’s all we need to get good results out of something like Dehumaniser 2. So I’m using Nectar three for EQ and compression. I’ll go ahead and turn off all of the processing so you can hear the raw voiceover through the Spirit of Halloween. We pledge our nightly offering Speak now so you can hear it’s just kind of a silly over the top hammy performance. It’s supposed to be campy and fun and evoke that kind of old style horror.
So it’s a pretty dynamic performance. So Nectar is handling some of those dynamics for me.
To the Spirit of Halloween. We pledge our nightly offering Speak now.
Brightens it up a little bit, gives it a little bit of life. Dehumaniser’s, obviously, what’s being used to handle the processing of the voice? This particular preset is splitting his voice into two bands. One is doing some pitch shifting, and then the other is doing additional pitch shifting with some flange or course on the first. So we’ll turn this off and then show you the difference that it makes to the Spirit of Halloween.
Our nightly offering speak. Now, do any of you object to the sacrifice?
So obviously you can see that our monster voice is essentially all reliant on Dehumaniser, basically turning John into this creature. I’m balancing each different pitch shifting set with this track input set of faders here, and you can see here. I’ll solo these to hear the different effects you’re getting from each of these modules to the Spirit of Halloween.
We pledge our nightly offering Speak now.
So I like that because that flange effect kind of makes it sound like there’s more than one person talking, kind of spreads things out a little bit. And then we have the initial set of pitch shifting, which is just going down by four semitones.
To the Spirit of Halloween.
We pledge our nightly offering speak now, do any of you object to the sacrifice.
So that’s the initial pitch shifting that we’re doing. But for that lower, more demonic sound, we’re going an entire octave down on this second pitch shifter.
Speak now them trapped to the sacrifice.
Shall this let him die?
I feel like with all those bands together, you get a much more kind of lively effect as opposed to just a single effect. It makes it sound like there’s more of John and it just sounds more demonic when there’s multiple layers and there are different pitches. If you go too low, the voice won’t read out around all the tractors that are running, pulling people through the hay ride and all the music and monsters and stuff. So we want to have one kind of higher pitched demon voice, which is our initial kind of minus four semi tones here.
And then we have that second layer, which is an octave down that gives us more body and kind of evil size, especially if we have, like, a 15 out there or subs out there. The octave down will really come through. So once we get through Dehumaniser, I run it through Decapitator, which is a sound toys plugin that just adds distortion. And again, the goal here is not Fidelity with these attractions. You’re outside, it’s loud. There’s all these different sounds and things to contend with. So for a voiceover to read.
Well, adding some distortion to it really makes a big difference. So this is what it sounds like without. And then with Decapitator, and you’ll be able to hear it more on this kind of more shouted.
Shall this man die.
Die just gives it a little extra edge, which I like. And then we have tape Echo, which is an avid plugin to just give it a little gravitas, I guess, a little spooky feel sure. So not much. There just kind of tucked behind. Then we have Nimbus, which is an exponential audio Reverb that I like quite a bit shopping, which gives it some size, makes it sound like you’re in kind of a Church, which the set kind of mocks. And then I’m adding a limiter on top of that so that we can kind of even out the performance even more, which of course, has to do with, like I said, it reading out there in the real world.
So that intro scene altogether sounds like this.
Speak now.
Shall this man die.
So now we hit some risers, right. This is leading up to the physical effect of the guillotine dropping. So we’re trying to increase suspense here, give the people something to look at. The guillotine is drawn, and then the guillotine drops and cuts off a prop head that falls off in front of everybody, which who doesn’t want to see that. So the risers are just kind of strings. Again, most of the sound design is organic because it’s kind of a cult horror feel the set of risers, which is pretty nice feel one of them has Reverb on it so that when it hits that end, it doesn’t go fully silent.
It kind of tails out, which I think is a real nice kind of touch. So then we have our guillotine sound and our impacts. Everything kind of escalates into that one moment so when everything comes together, this is when the big finale hits. The idea is head gets cut off. Monsters attack. So this is a guillotine sound effect with some additional library stuff on top of it. Pretty heavy. Some additional impacts that you can see. I have a loop on top of the music. Now we hit some Gore sounds.
These are taken from a library. That sound morph, makes that’s Gore specific, and they sound pretty fantastic. You can hear what that sounds like here. These are just waves that I pulled out. But then there’s a bunch of Reformer performances that work with the sound more flabberries that you’ll be able to see how I kind of performed the Gore sounds. So here’s some of the just flat wave files pulled from that library. Hopefully you can hear that. Just some blood spilling there. And then this is a little bit more of an impact sound like a bones breaking kind of thing.
And then we have these performed kind of Gore sounds. Take a listen to that pretty gross. Right? So those are actually performed by me. I just kind of did the sounds with my mouth. So let’s listen to what those sound like without Reformer on them. All the audio is going to pan left for a second because it’s a stereo track, but it’s just a mono recording. So take a listen to this. So I’m just saying splat a bunch because I’m an idiot, but yeah, so what you’re hearing is just my silly splats.
But with Reformer turned on on that bloody gory set of library sounds that we got from soundmore, and I just added layers of different styles of sounds. So those are splatters, obviously. Then you have disembowelments and gory wet squishes, which sounds like this pretty disgusting. And these are bone crunches. And then lastly, we have some limbs being ripped off, but altogether they make a cacophony of awful grossness. Now, on top of everything being played together, this is what that Gore kind of sounds like. So it’s pretty effective.
I have some limiting going on. You can see some pretty heavy limiting on these tracks because I want to bring that door up to sit on top of the mix, and it’s not super impactful. So by giving it some heavy limiting, it just lets it sit on top of the mix a little bit more. So don’t be afraid to just crush stuff if you’re working in this type of environment. So on top of all that, there’s this loop of drums with this chant over the top of it, it’s supposed to be like a cult chant.
So the drum loop is all kind of based around this initial loop from the Hell Drums Library, which sounds like this, which has this kind of nice industrial feel to it. The only thing that I would say is really inorganic, but I think it works well because it’s just drums, and it only comes in for the finale. On top of that, I added a more organic drum sound loop to play over the top of that. And that’s a drum library called Siege Drums. It’s a contact library.
And then we have this chant and this chant is made up of a lot of voice processing. So this is what that chant sounds like. The idea was that I wanted this to sound like multiple people in the cult are chanting it at you while they run after you. So just some basic EQ at first. Then we hit Dehumaniser. Dehumaniser is similar processing, but one of the differences on the output section, I’ve pulled down the dry wet so that some of the original performance is still in there because this is multiple layers of John doing that chant.
So what’s happening there is we’re taking multiple recorded passes, layering them on top of each other and just creating a stereo track of the layered passes. Then we’re throwing Dehumaniser on it, kind of giving it some space there. But then we’re also adding some additional processing to give it more of a stereo spread. So this is a Plugin Alliance plugin called Stage that is really nice for creating kind of spread feel. So let’s listen without. So if you have headphones on, you’ll really be able to hear that.
It gets much bigger and then Decapitator again because we’re going to add overdrive to try to bring this track a little bit more, even with the rest of all the distorted drums and things you’re hearing makes it a little fatter. Adding some tape Echo in again for kind of spookiness, but it’s in time with the drums, which kind of gives it a rhythm that’s nice. And then finally we’re applying some heavy limiting so that we can get everything kind of even in a performance with all of our voiceover content to Humanizer is kind of the base of creating that inhuman voice.
And then for a lot of the spot effects like the chains and the Gore and stuff, rather than me going in and laying in sound effects one by one. I’m actually just performing it with my voice and then throwing Reformer on it. And then Reformer does the sample replacement for me, and I don’t have to go in and create that track from scratch. It takes too long. An event like this has hundreds of sound effects. I actually have three full pro tool sessions of just regular pro tools because I can’t afford ultimate just for the sound design for this one attraction kind of shows you how many tracks invoices are needed to create all these different scenes that you drive through and give you kind of the event that you end up seeing in the end, stuff like Reformer Pro stuff like Dehumanizer and then the other plugins that I use just for this one scene are saving me a massive amount of time as I go through and try to build each of these scenes piece by piece.
So it’s important to recognise the tools that you have and to use them to their full creative capability. Even if you don’t know all the tricks, even if you don’t know everything from the manual or whatever. In the end, those incremental bits of time savings add up, especially when you have a deadline. The event opens on this date and we need to get hundreds and hundreds of individual elements designed in time. Sound checked, make edits, make sure it all works, and then the event opens and we’re up and running.
And it’s a beautiful thing when you have the right tools to do the job. So when it comes to Krotos their libraries, their relationships with other sound design groups like Sound Morph and Stuff, the libraries, the plugins, the people who work there are an incredible resource to go to when you need help with sound design, or if you need tools to get the job done. So check out Krotos Audio and if you have any interest in this topic, you want to learn more. Anything like that.
Go ahead and add me on YouTube or Instagram. Just look up Mysticfrequency or go to mysticfrequency.com. All right. My name is Dan Bieranowski, and I appreciate you watching this video with us. And like I said, if you ever want to talk about this nerdy boring crap, feel free to reach out. Thanks.
Feature products


$478.80


$478.80

Sign up to the Krotos newsletter and get free sound effects to your inbox every month!
Our monthly free sounds offer you a wide range of sound categories from Foley, combat sounds, impacts, animal sounds, to transitions and more!
Join the newsletter