No products in the basket.
Quickguide to Dehumaniser 2
Dehumaniser 2 is a powerful vocal processing tool perfect for a range of vocal effects such as monsters or robots, but also incredibly versatile for subtle dialogue, voice-over and music processing.
Essentially, it’s a tool that lets you go…
From this…
To this…
In a matter of minutes.
In this article, we are going to take a look at how to get started with designing your own sounds in Dehumaniser 2.
It is a complex beast (pun intended) and if you’ve recently bought it or downloaded the demo and want to know how to make monsters come to life, this guide is for you. If you are a seasoned Dehumaniser pro, worry not! I’m going to go over some not-so-obvious uses of the plugin later in the article so I can show you how you can go beyond monster design.
Getting Started
The plugin is available in VST, AU and AAX format. Any specific information about the setup can be found here. To use Dehumaniser 2, we need an input. You can design and perform your monsters in real-time by routing a microphone to the track with the plugin. You can also use pre-recorded audio.
Your voice is a powerful sound design tool and Dehumaniser lets you go beyond your vocal capabilities to deliver unique, larger-than-life sounds. Once you have an input, you will be greeted with the default patch constructed in Dehumaniser’s node-based system.
The node system allows you to chain effects in a very flexible and easy way, without the need to stack them on separate tracks in your DAW.
Apply basic processing
You have plenty of different nodes to choose from so don’t worry and don’t get overwhelmed! We’ll start with something that’s easy to make and sounds good. You can follow these simple steps to make your first monster sound. Experiment with the values inside of the nodes to find the tone you are looking for. Have fun and try different things!
This is a raw vocal recording of yours truly that I am going to be processing:

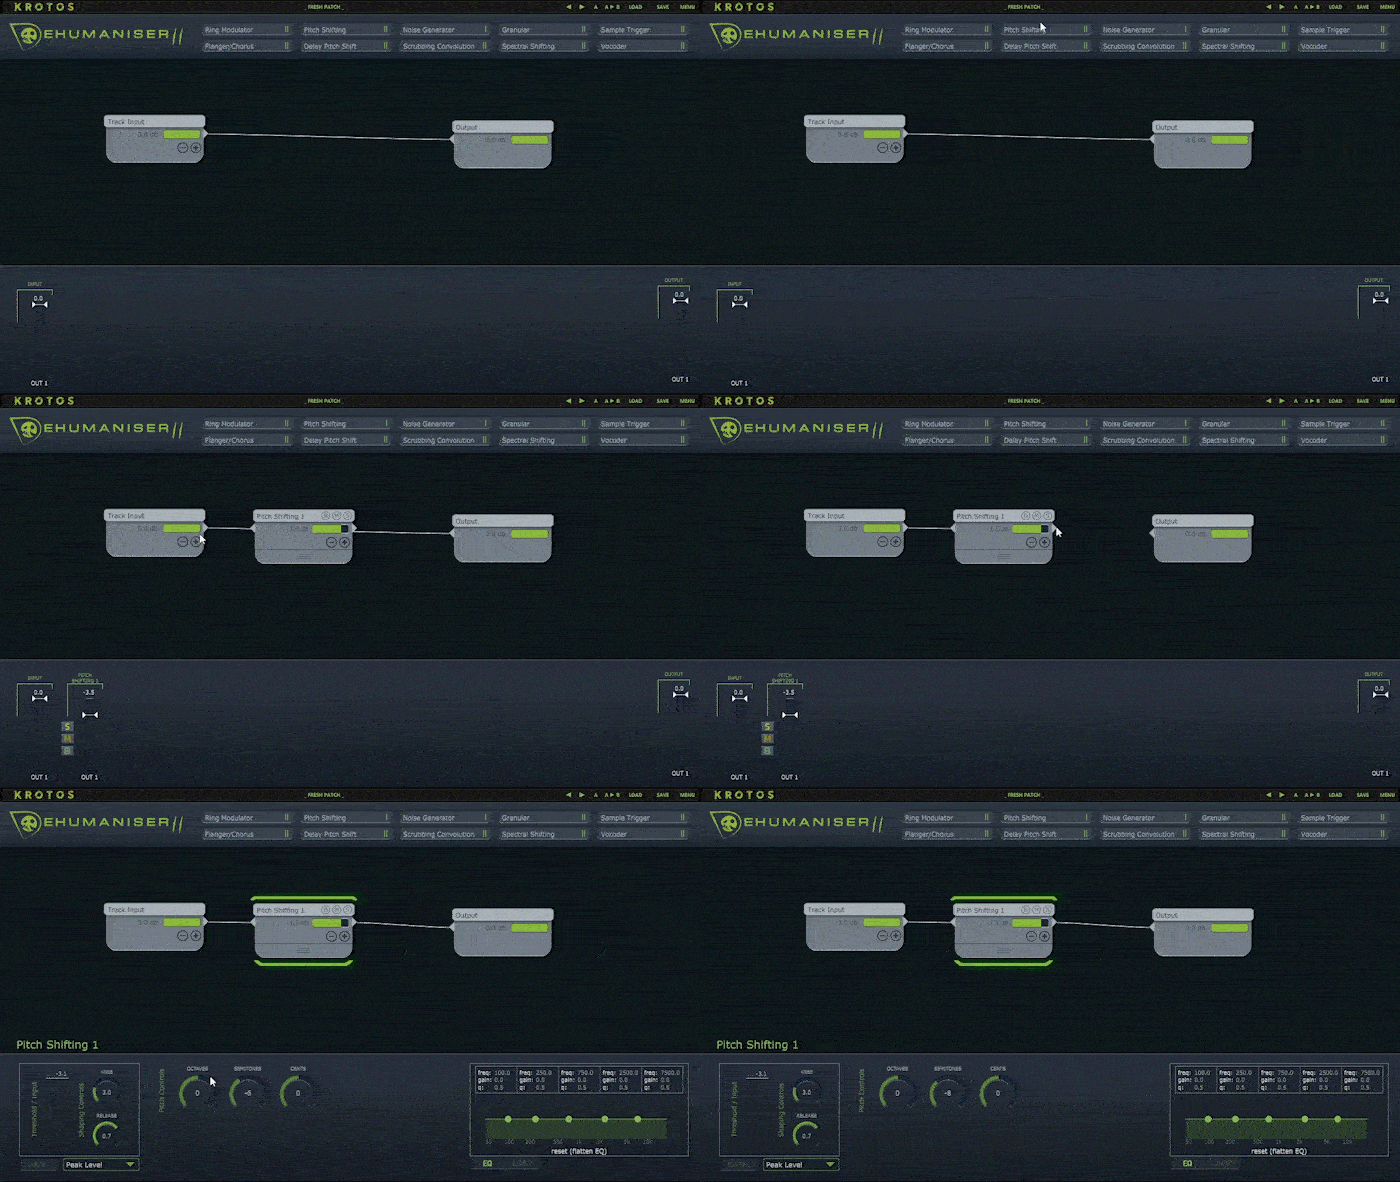
You can create your own presets from scratch by selecting the _Fresh Patch_ in the preset drop-down. Lets start by making a simple monster. Pitch Shifting is going to be our friend here. Simply drag and drop the node and connect it to the output. Sounds dehumanised already!
Parallel processing
That’s a good start but we just barely scratched the surface. The main point of using the node system is that you can either chain effects together or you can run them in parallel. This gives you a plethora of design possibilities and allows you to prototype and design your sounds in seconds by just changing the connection of the nodes.

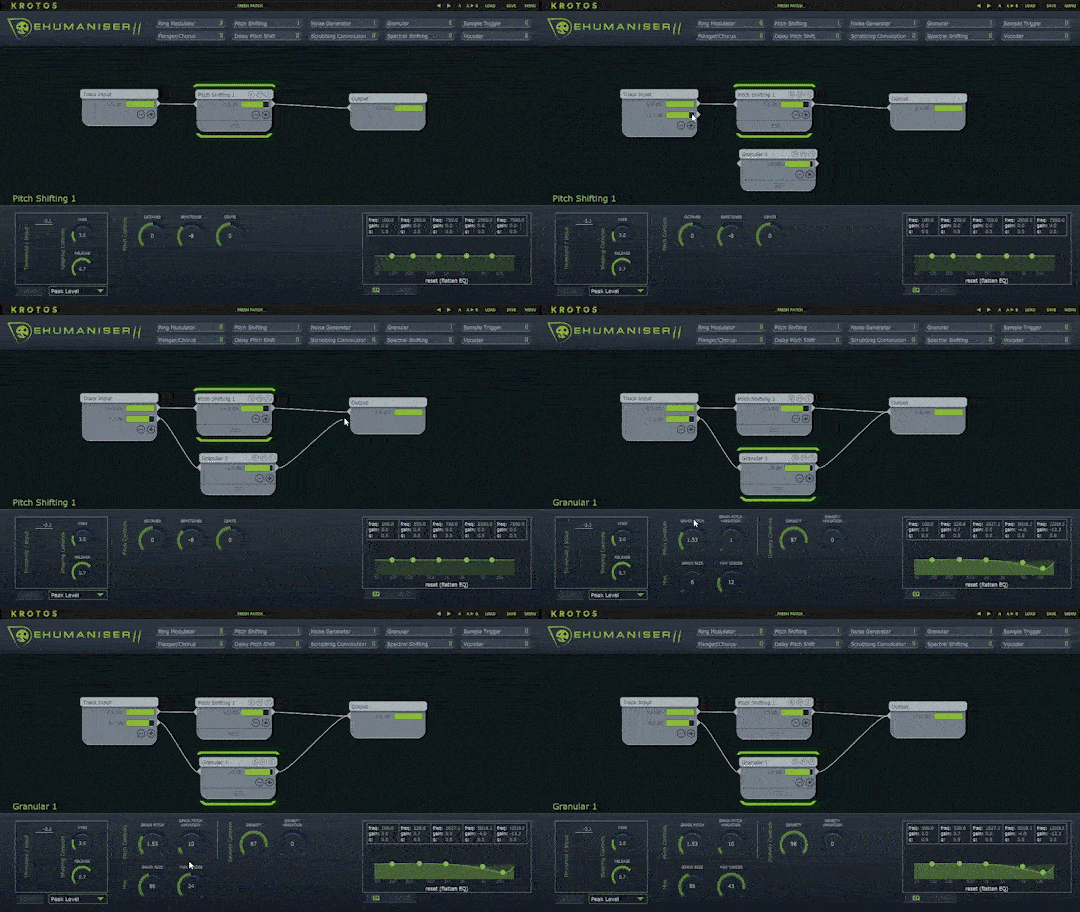
Lets start with running some processing parallel. This means that it will be a separate processing chain, that will only meet with our Pitch Shift once we sum everything in the output. Think of it as adding another track in your DAW only that you can control everything from the same UI. We are going to make our monster a bit more interesting by adding the Granular node. It chops up the input into tiny grains that last only a couple of milliseconds and fires them off together with a specified density.
Chaining effects
This is starting to take shape but there’s more ahead of us. I haven’t shown you how to chain effects yet! You can do it the same way as you would on a track in your DAW. Connect the output of one processing node to the input of another processing node. You can think of Dehumaniser as one gigantic multi-effect plugin that allows you to do both effect chaining and parallel processing. Convenient, right?
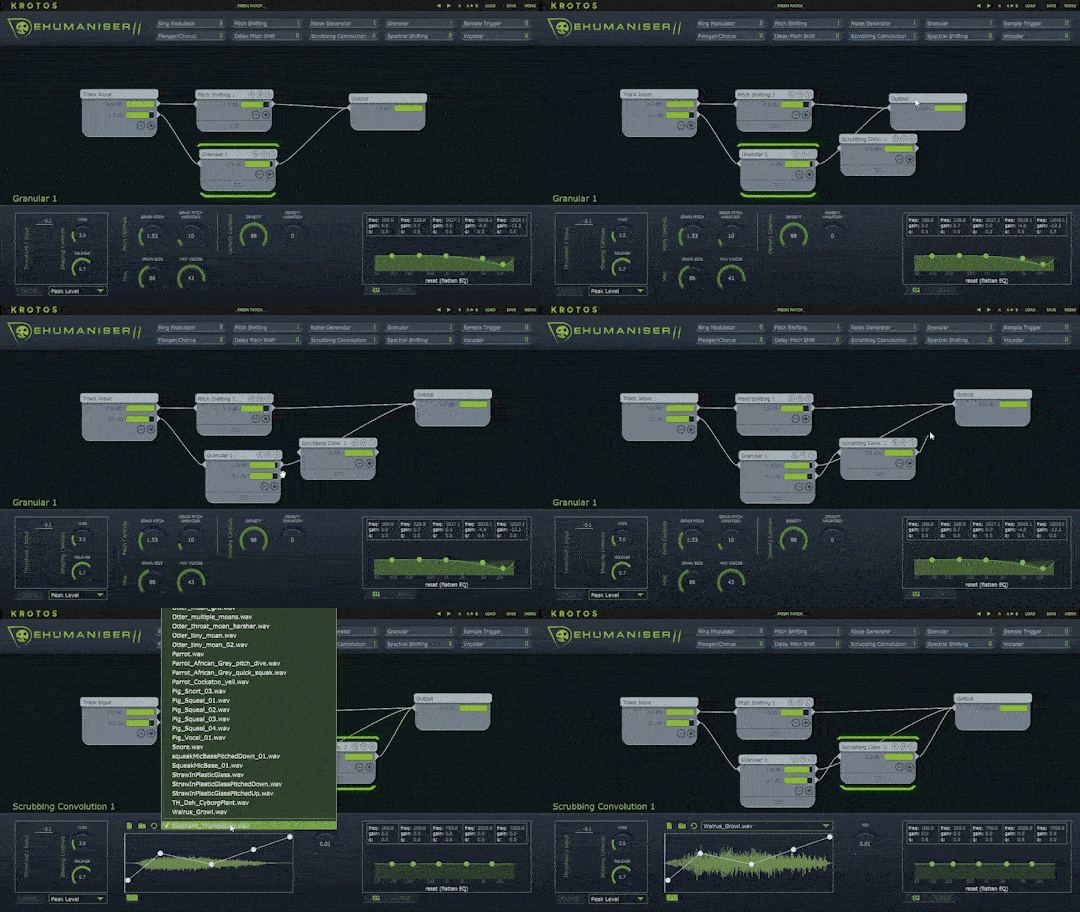
We are going to chain the Granular node with a Scrubbing Convolution node. You may be familiar with convolution reverb. This is very similar. We will modify the input of this node by imposing a different audio source on it. Let’s add a Walrus Growl to our vocals shall we?

For this part, I liked the Granular output as it is as well so I added another output so I have a sound both affected and unaffected by the Scrubbing Convolution. Adding outputs in nodes is a powerful way of creating layers upon layers of both parallel and chained processing. Every node comes equipped with an EQ and a limiter so you can also mix while designing.
And there you go, your first monster is ready! Congratulations Dr Frankenstein!
Dehumaniser 2 for Voice-Over
Usability of Dehumaniser goes beyond creature sound design. With a different approach to processing, we can create patches that can be used for dialogue, be it in post-production or game audio.
With our latest 1.2.1 patch, we have included several presets for transparent processing. Those are usually light effect touches that slightly shift the timbre of your voice so you can make it deeper or more nasal. Dehumaniser comes equipped with a plethora of voice samples for testing so if you want to check out how a patch would sounds applied to voice-over, you can grab the files from the install directory.
You can also apply heavier processing to worldise your sounds. Do you need to create an effect of someone talking through a tiny speaker? Head to the Speaker preset section and you will find examples of that. The Noise Generator node is very helpful here.
Dehumaniser 2 For Music Production
With the update, we also added loads of music presets! Combining the power of Pitch Shift and Delay Pitching, you have 4 pitch nodes that you can use to create vocal harmonies. Some standard harmonies are included in the Music preset section. You can instantly turn your voice into a choir and perform major, minor and house chords while still recording only one note!
As you can hear, taking advantage of the versatility of the tool, we went far beyond creature sound design.
Check out other nodes for music production. Vocoder works great for processing vocals and the Flanger node adds space to anything you put into it. For wilder vocal processing, turn to granular and create pads out of your voice!
Pro tip: If you add the Vocoder node, turn the mode to Noise and increase the Release, you have now created a reverb-like effect inside Dehumaniser!
Next Steps
We have now gone through a couple of different use cases and we also constructed a nice sounding patch from scratch. That’s a good, but your Dehumaniser adventure is only starting! If you’d like to know more about the tool and how to design your own presets, browse through the factory presets and see what you like. Try it out with different inputs, maybe even beyond voice samples? This is a powerful effect chain that you can apply to sound effects as well! We have recently added artist presets from Tyler Hoffman (Sony) and Damjan Mravunac (Serious Sam) which are a great starting point to see how you can squeeze fantastic sounds out of the plugin.
For more in-depth tutorials, visit our YouTube channel
You will find a plethora of videos from us and Dehumaniser users showing you all the different ways in which you can bend and twist your vocals.
Download a free 10 day demo.
Dehumaniser 2 is available for a free trial, so make sure you get your copy to test it out in your own projects.

